Chuck roast: the unsung hero of the meat aisle. Often overlooked for flashier cuts, this versatile and affordable piece of beef holds immense potential for creating incredibly flavorful and satisfying meals. This comprehensive guide will unlock the secrets of chuck roast recipes, transforming you into a master of this delicious and budget-friendly protein.
I. Introduction: The Underrated Chuck Roast
A. What is a Chuck Roast?
A chuck roast comes from the shoulder area of a cow. It’s a well-exercised muscle, which means it can be a bit tougher than other cuts. However, this also translates to rich, beefy flavor.
B. Why Choose Chuck Roast?
There are several compelling reasons to embrace chuck roast in your kitchen:
- Affordability: Compared to pricier cuts like tenderloin or ribeye, chuck roast offers exceptional value for your money.
- Flavor: The marbling within the chuck roast imparts incredible depth of flavor, especially when cooked using low and slow methods like braising.
- Versatility: Chuck roast doesn’t limit you to one type of dish. It excels in pot roasts, braises, stews, and can even be shredded for sandwiches or tacos.
C. Selecting the Perfect Chuck Roast
Choosing the right chuck roast sets the stage for culinary success. Here are some key pointers:
- Marbling: Look for a cut with good marbling throughout. These intramuscular flecks of fat contribute to tenderness and flavor during cooking.
- Size: Select a roast that fits comfortably in your Dutch oven or pot. A typical chuck roast weighs between 2 and 4 pounds.
- Freshness: Opt for a bright red roast with a firm texture. Avoid cuts with dull coloring or a slimy surface.
II. Classic Cooking Methods for Chuck Roast:
A. The All-American Pot Roast:
The quintessential chuck roast recipe, the pot roast is a heartwarming and comforting dish.
1. Searing the Chuck Roast for Maximum Flavor
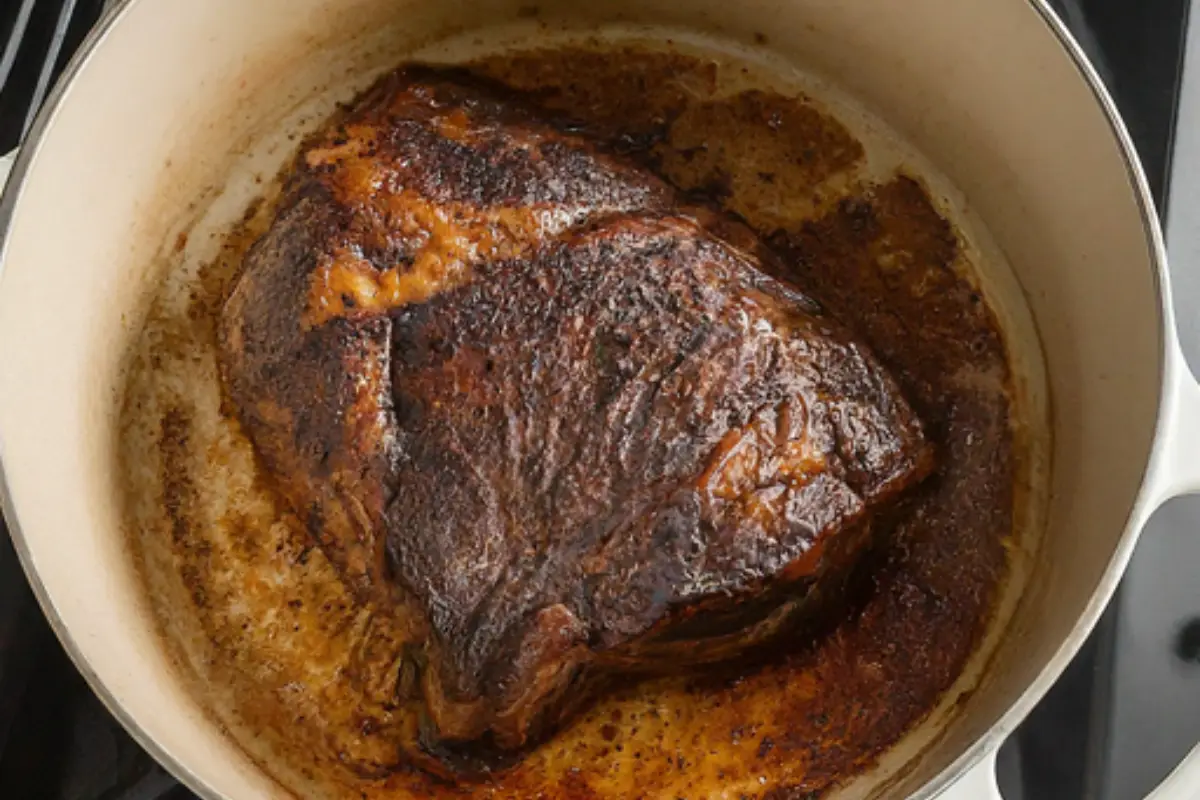
Pat the chuck roast dry with paper towels. Season generously with salt and pepper. Heat a large Dutch oven or oven-safe pot over medium-high heat with a drizzle of oil. Sear the roast on all sides until deeply browned. This caramelization, known as the Maillard reaction, adds incredible depth of flavor to the final dish.
2. Building the Braising Liquid
Remove the seared chuck roast from the pot. Add chopped onions, carrots, and celery to the pot and cook until softened. Deglaze the pan by pouring in red wine or beef broth, scraping up any browned bits stuck to the bottom. This deglazing step incorporates all the flavorful caramelized bits into the braising liquid.
3. Low and Slow Cooking (Oven Braising vs. Slow Cooker)
Return the chuck roast to the pot along with the vegetables, herbs like thyme and rosemary, and enough beef broth to come halfway up the roast. Bring to a simmer, then cover and transfer the pot to a preheated 300°F (150°C) oven. Alternatively, you can use a slow cooker on low for 6-8 hours. The low and slow cooking process allows the tough muscle fibers to break down, resulting in a melt-in-your-mouth texture.
4. Adding Vegetables (Potatoes, Carrots, Onions)
In the last hour of cooking, add root vegetables like potatoes, carrots, and pearl onions to the pot. These additional vegetables absorb the delicious braising liquid, creating flavorful side dishes alongside the tender chuck roast.
5. Finishing Touches and Gravy Options
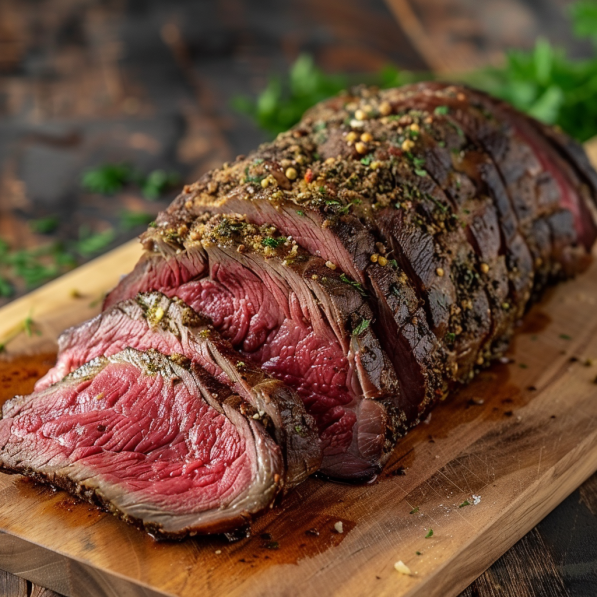
Once the chuck roast is fork-tender (usually after 2-3 hours in the oven or 6-8 hours in the slow cooker), remove it from the pot and let it rest for 10-15 minutes. This allows the juices to redistribute throughout the meat, ensuring a more flavorful and moist final product.
For a richer sauce, you can thicken the remaining braising liquid by whisking in a cornstarch slurry or a roux (made with butter and flour). You can find a detailed guide to making gravies on FlavorFlourish.com [link to your gravy recipe on FlavorFlourish.com].
B. Dutch Oven Braised Chuck Roast:
The Dutch oven is a near-perfect vessel for braising chuck roast. Its heavy construction ensures even heat distribution and superior moisture retention, leading to exceptionally tender and flavorful results.
1. Benefits of Dutch Oven Cooking:
The Dutch oven’s tight-fitting lid traps steam, creating a
Tight-fitting lid traps steam, creating a self-basting environment that keeps the chuck roast moist and succulent throughout the cooking process. Additionally, the Dutch oven’s thick bottom distributes heat evenly, preventing hot spots that can scorch the meat.
2. Dutch Oven-Specific Tips:
While the overall process for Dutch oven braising is similar to the pot roast method, there are a few key adaptations:
- You can sear the chuck roast directly in the Dutch oven over medium-high heat, eliminating the need for a separate pan.
- Since the Dutch oven retains heat so well, you might need to adjust the cooking time slightly. Start with checking the roast for tenderness after 2 hours in a preheated 325°F (163°C) oven.
C. Pressure Cooker Chuck Roast:
For those seeking a time-saving approach, the pressure cooker comes to the rescue.
1. Time-Saving Advantages of Pressure Cooking
Pressure cookers significantly reduce cooking times by utilizing high pressure and steam to cook food rapidly. This can transform a traditionally long braising recipe into a weeknight meal option.
2. Pressure Cooker Chuck Roast Techniques:
The basic steps for pressure cooker chuck roast involve searing the meat, building a flavorful braising liquid (similar to the pot roast method), and pressure cooking for a shorter duration compared to the oven or slow cooker.
- A typical pressure cooker chuck roast recipe might involve cooking on high pressure for 1-1.5 hours, depending on the size of the roast.
- It’s crucial to consult your specific pressure cooker’s manual for proper usage and timing recommendations.
Important Safety Note: Always ensure your pressure cooker is properly functioning and follow all safety guidelines before operating it [link to pressure cooker safety information on a reputable website like the National Center for Home Food Preservation (.gov) or an appliance manufacturer’s website].
III. Global Inspirations for Chuck Roast:
Chuck roast’s versatility extends beyond traditional American comfort food. Let’s explore some international culinary adventures:
A. Korean Braised Chuck Roast (Bulgogi):
Bulgogi is a beloved Korean dish featuring thinly sliced marinated beef. While traditionally made with flank steak, chuck roast can be an excellent substitute.
1. Korean Marinade Secrets:
The key to authentic bulgogi lies in the marinade. A typical bulgogi marinade combines soy sauce, brown sugar, Korean chili paste (gochujang), garlic, ginger, sesame oil, and scallions. These ingredients create a sweet, savory, and slightly spicy flavor profile that infuses the chuck roast beautifully.
2. Serving Suggestions:
Thinly slice the cooked chuck roast and serve it over rice with kimchi, a spicy fermented cabbage side dish. You can also use the bulgogi in lettuce wraps for a refreshing and healthy option.
B. Italian Braised Chuck Roast (Brasato):
Italian cuisine offers another delicious variation on braised chuck roast with Brasato.
1. Italian Wine Selection:
Brasato typically features a red wine braising liquid. Popular choices include Barolo, a full-bodied wine from Piedmont, or Chianti, a classic Tuscan red wine. The wine adds depth of flavor and complexity to the dish.
2. Adding Italian Herbs and Vegetables:
Italian herbs like rosemary and thyme complement the braised chuck roast beautifully. Additionally, vegetables like celery, carrots, and onions are often included, adding textural contrast and extra flavor to the braising liquid.
3. Polenta as a Perfect Accompaniment:
Brasato is traditionally served with creamy polenta, a cornmeal porridge that provides a delightful textural contrast to the tender meat. You can find a delicious polenta recipe on FlavorFlourish.com [link to your polenta recipe on FlavorFlourish.com].
C. Mexican Barbacoa Chuck Roast:
Mexican barbacoa is a flavorful shredded beef dish commonly used in tacos. While traditionally made with beef cheek, chuck roast is a fantastic substitute.
1. Slow Cooker Barbacoa for Shredded Beef Perfection:
The slow cooker is an ideal tool for creating barbacoa. Simply combine chuck roast with chipotle peppers in adobo sauce (for smoky depth), cumin, oregano, and other Mexican spices. Cook on low for 8-10 hours, shred the meat with forks, and enjoy!
2. Chipotle Peppers in Adobo Sauce for Smoky Flavor:
Chipotle peppers in adobo sauce are a key ingredient in barbacoa. They are jalapenos that have been smoked and dried, then rehydrated and canned in a rich, flavorful adobo sauce. This adds a smoky and slightly spicy dimension to the barbacoa. You can find chipotle peppers in adobo sauce in the Latin American section of most grocery stores.
3. Taco Toppings and Serving Ideas:
Fill warm tortillas with shredded barbacoa, top with chopped onions, cilantro, and your favorite taco toppings like salsa, guacamole, and sour cream. Barbacoa can also be used in burritos, nachos, or enchiladas.
IV. Creative and Unexpected Chuck Roast Recipes:
Chuck roast’s adaptability extends beyond traditional braises. Here are some innovative ways to use this versatile cut:
A. Pulled Chuck Roast Sandwiches:
1. Flavorful Pulled Pork Inspiration with Chuck Roast:
Pulled pork sandwiches are a classic American comfort food. But did you know you can achieve a similar result with chuck roast? By braising the chuck roast until fork-tender and shredding it, you can create a delicious pulled beef filling for sandwiches.
2. BBQ Sauce Variations and Toppings:
Toss the shredded chuck roast in your favorite BBQ sauce for a smoky and tangy flavor. Pile it high on toasted buns and add classic toppings like coleslaw and pickles for a satisfying sandwich experience.
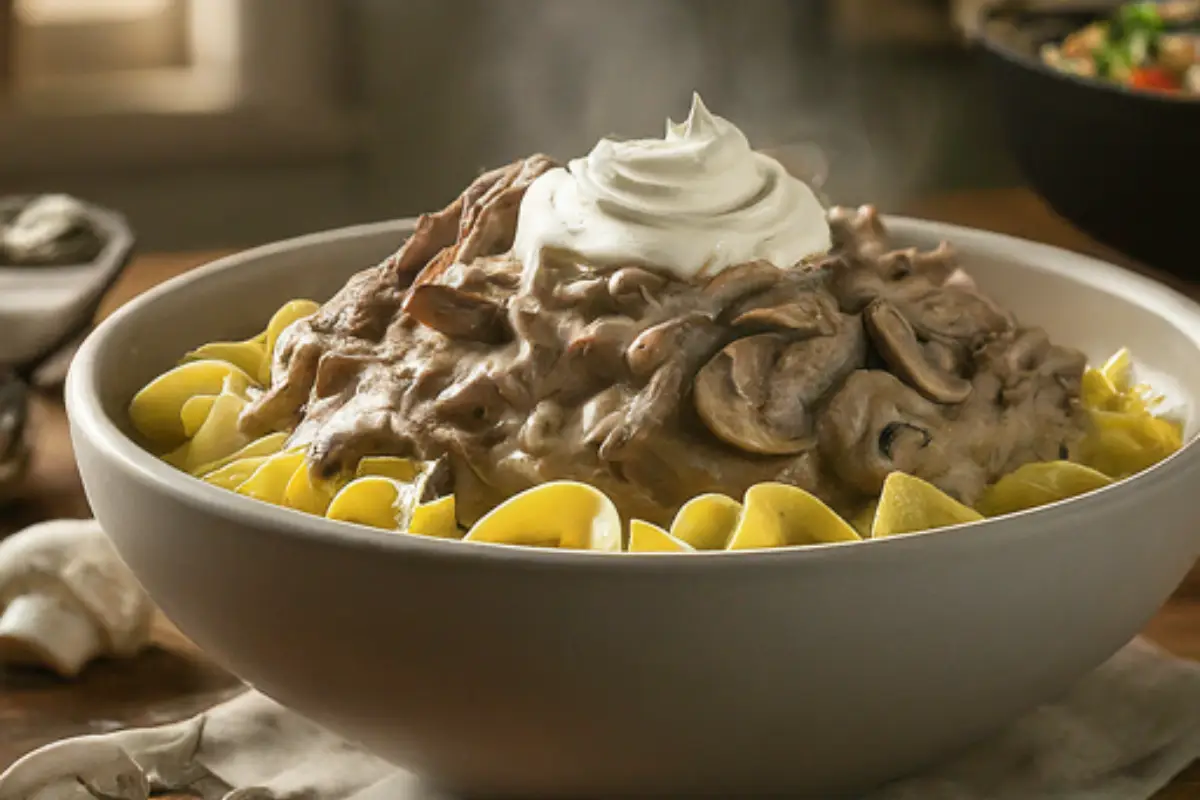
B. Chuck Roast Stroganoff:

1. A Rich and Creamy Twist on a Classic:
Stroganoff is a creamy mushroom and beef dish traditionally made with sirloin steak. However, chuck roast can be a more budget-friendly and flavorful substitute.
2. Utilizing Leftover Chuck Roast for a Quick Meal:
This recipe is a perfect way to use leftover chuck roast. Simply shred the cooked chuck roast and saute it with mushrooms, onions, and garlic in a pan. Then, add some beef broth, sour cream, and Dijon mustard to create a rich and creamy sauce. Serve over cooked noodles or rice for a quick and satisfying meal.
3. Serving with Noodles or Rice:
Stroganoff is typically served over egg noodles or rice. You can choose whichever starchy base you prefer to soak up the delicious sauce.
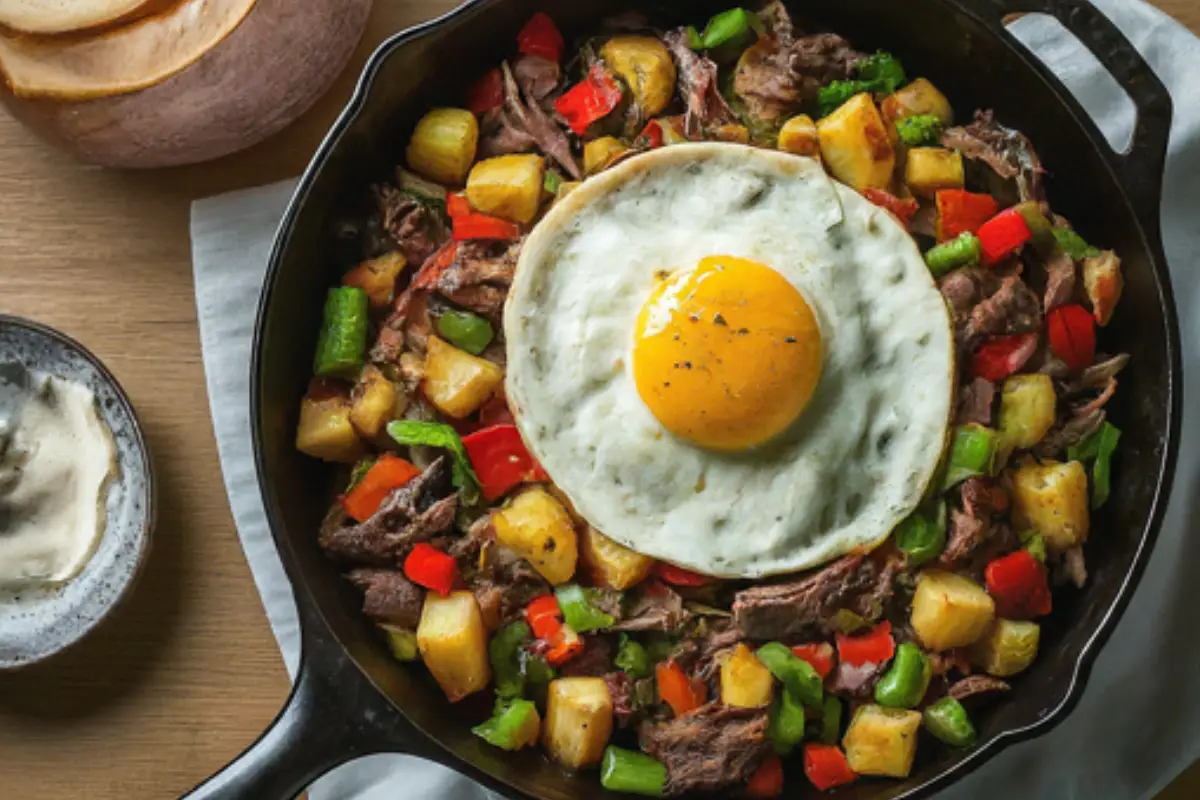
C. Chuck Roast Hash:

1. Hearty Breakfast or Brunch Option:
Chuck roast hash is a fantastic way to repurpose leftover chuck roast into a hearty and satisfying breakfast or brunch dish.
2. Combining Leftover Chuck Roast with Potatoes and Vegetables:
Simply saute diced potatoes, onions, and peppers until tender. Then, add shredded leftover chuck roast and cook until heated through. Season with salt, pepper, and your favorite breakfast spices like paprika or cayenne pepper.
3. Adding Eggs for a Complete Meal:
Fry, scramble, or poach eggs to your liking and serve them on top of the chuck roast hash. This protein-packed combination will keep you feeling full and energized throughout the morning.
V. Essential Tips and Tricks for Chuck Roast Success:
A. Seasoning is Key: Salt, Pepper, and Beyond:
Don’t underestimate the power of proper seasoning. Season your chuck roast generously with salt and pepper before searing. You can also experiment with additional spices like garlic powder, onion powder, smoked paprika, or dried herbs like thyme and rosemary.
B. Don’t Skip the Sear: Maillard Reaction for Rich Flavor Development:

Searing the chuck roast before braising is a crucial step. This high-heat cooking method creates a brown crust on the meat’s surface through a process called the Maillard reaction. The Maillard reaction not only adds beautiful color but also unlocks complex flavors that enrich the entire dish.
C. Choosing the Right Liquid: Broth Options (Beef, Chicken, Vegetable):
The braising liquid plays a significant role in the final flavor profile of your chuck roast. You can use beef broth for a classic rich taste, chicken broth for a lighter option, or even vegetable broth for a vegetarian twist.
D. Cooking Time Variations: Internal Temperature for Perfect Tenderness:
Cooking times can vary depending on the size and thickness of your chuck roast, as well as the cooking method used. The most reliable way to determine doneness is by checking the internal temperature. The USDA recommends an internal temperature of 195°F (90°C) for safe consumption of braised beef [link to safe minimum internal temperatures for meat and poultry from the USDA (.gov)].
E. Leftover Magic: Repurposing Chuck Roast for New Dishes:
Chuck roast is incredibly versatile when it comes to leftovers. Shred it for sandwiches, tacos, or hash. Use it in soups, stews, or stir-fries. The possibilities are endless!
VI. Conclusion: Chuck Roast – A Weeknight Hero
A. Recap of Chuck Roast’s Versatility and Affordability:
Chuck roast is a budget-friendly cut of beef with immense culinary potential. It excels in slow-cooked dishes, offering incredible flavor and tenderness. Whether you’re craving a classic pot roast, a global culinary adventure, or a creative leftover transformation, chuck roast can become your weeknight hero.
B. Encouragement to Experiment and Create New Recipes:
Don’t be afraid to experiment with different flavors and ingredients. Use this guide as a springboard to create your own signature chuck roast dishes. With its affordability and versatility, chuck roast is a cut of beef that deserves a permanent place in your kitchen repertoire.
VII. Bonus Section: Chuck Roast FAQs (Frequently Asked Questions):
A. What if my Chuck Roast is Tough? (Troubleshooting Overcooking):
If your chuck roast turns out tough, it likely means it wasn’t cooked long enough. The key to tender chuck roast is low and slow cooking. Allow the muscle fibers to break down completely for a melt-in-your-mouth texture.
B. Can I Substitute Another Cut of Beef? (Considerations for Different Cuts):
While chuck roast is an excellent choice for braising, you can substitute other cuts if necessary. Brisket, another well-exercised muscle, is a good alternative. However, brisket can be slightly fattier than chuck roast. If you prefer a leaner cut, rump roast might be an option, but keep in mind it may require slightly less cooking time due to its lower fat content.
C. How Long Does Leftover Chuck Roast Last? (Safe Storage Guidelines):
Proper storage is essential for food safety. Leftover chuck roast can be stored in an airtight container in the refrigerator for up to 3-4 days. You can also freeze leftover chuck roast for longer storage. Wrap it tightly in freezer paper or place it in a freezer-safe container for up to 3 months.
For mere recipes visit our websites categories here


